Croquetas are probably my favorite Spanish food. They are a staple of tapas bars, but they are really best when made at home. My mother loves them too. In fact when Javier and I announced our plans to marry, she asked what she was getting in return for losing her daughter. Javier offered croquetas, and she jumped at the opportunity. So, I was basically traded for about a dozen croquetas. I don't know if that means they are very valuable, or that I'm not worth much, but they are definitely delicious.
Croquetas are breaded and fried roll of bechamel with assorted fillings. You can basically put any fillings in the croquetas. People often use leftovers. They can be filled with vegetables, meat, fish, or seafood. We always put the same ingredients in our croquetas.
Ingredients:
- 1/2 red bell pepper
- 1/2 green bell pepper
- 1/2 onion
- 4 cloves garlic
- 1 cup (250ml) steamed spinach
- 1 chicken breast
- 3oz (85g) ham
- 4 cup (1 L) Moderately consistency bechamel*
- flour (for coating croquetas)
- 2-3 eggs
- bread crumbs
*We will post a video later of good technique for making a creamy and smooth bechamel.
Mince the red pepper, green pepper, onion, and garlic. Saute in a pan on medium heat with a little olive oil until the onions are translucent and the peppers are soft. Put aside in a large bowl.
Steam the spinach until it is completely wilted. Take from steamer and put into a strainer. You need to get as much water out of the spinach as possible, otherwise the water will make the croquettas soggy. I usually squeeze it in a fine mesh strainer until it is relatively dry. Remove the squeezed spinach from the strainer and mince it on the cutting board. Put this with the cooked vegetables you placed in the large bowl earlier.
Chop the chicken breast and cook in a pan on medium heat. Use only a little oil; you do not want the chicken to get to oily. Salt the chicken thoroughly, because we won't be adding much salt to the croquetas otherwise. Put the cooked chicken in the large bowl with the vegetables and spinach.
Finally, chop the ham and add it to the bowl. Mix all of the ingredients and then add the bechamel. Mix to ensure that all ingredients are thoroughly coated with the bechamel. Make sure there are no clumps of fillings. You can add a little more salt at this point.
Now comes the most complicated part of making croquetas. Usually when we make croquetas, we make a lot of filling so that we can freeze the rolls and we don't have to make them too often. It is a very labor intensive food, so make sure you have the time to do it.
What makes these little morsels so hard to produce is that you are taking a semi liquid - the bechamel - and trying to roll it into a ball. If you are doing this for the first time, you might want to make a thicker bechamel. We actually make a fairly runny bechamel, because it makes the finished product so much better. Since our bechamel is of moderate consistency, we usually put the bowl with all the fillings and bechamel into the freezer for a while. We try to get the mix cold enough that it is more solid, but not so cold that it crystallizes and is frozen. Even if you are using a thick bechamel, you should leave the mix in the fridge for a couple hours to make it easier to work with.
Now that our bechamel and filling mix is cold and more solid, we are ready to make the croquetas. Prepare three small bowls: one with flour, one with whisked egg, and one with breadcrumbs. I usually add a little water to the egg to make it last longer and coat the croquetas more evenly.
Take a large spoonful of bechamel mix and drop it in the flour. Using your hands, gently roll it around until it is completely coated. Carefully transfer to egg bowl and gently maneuver until it is coated.
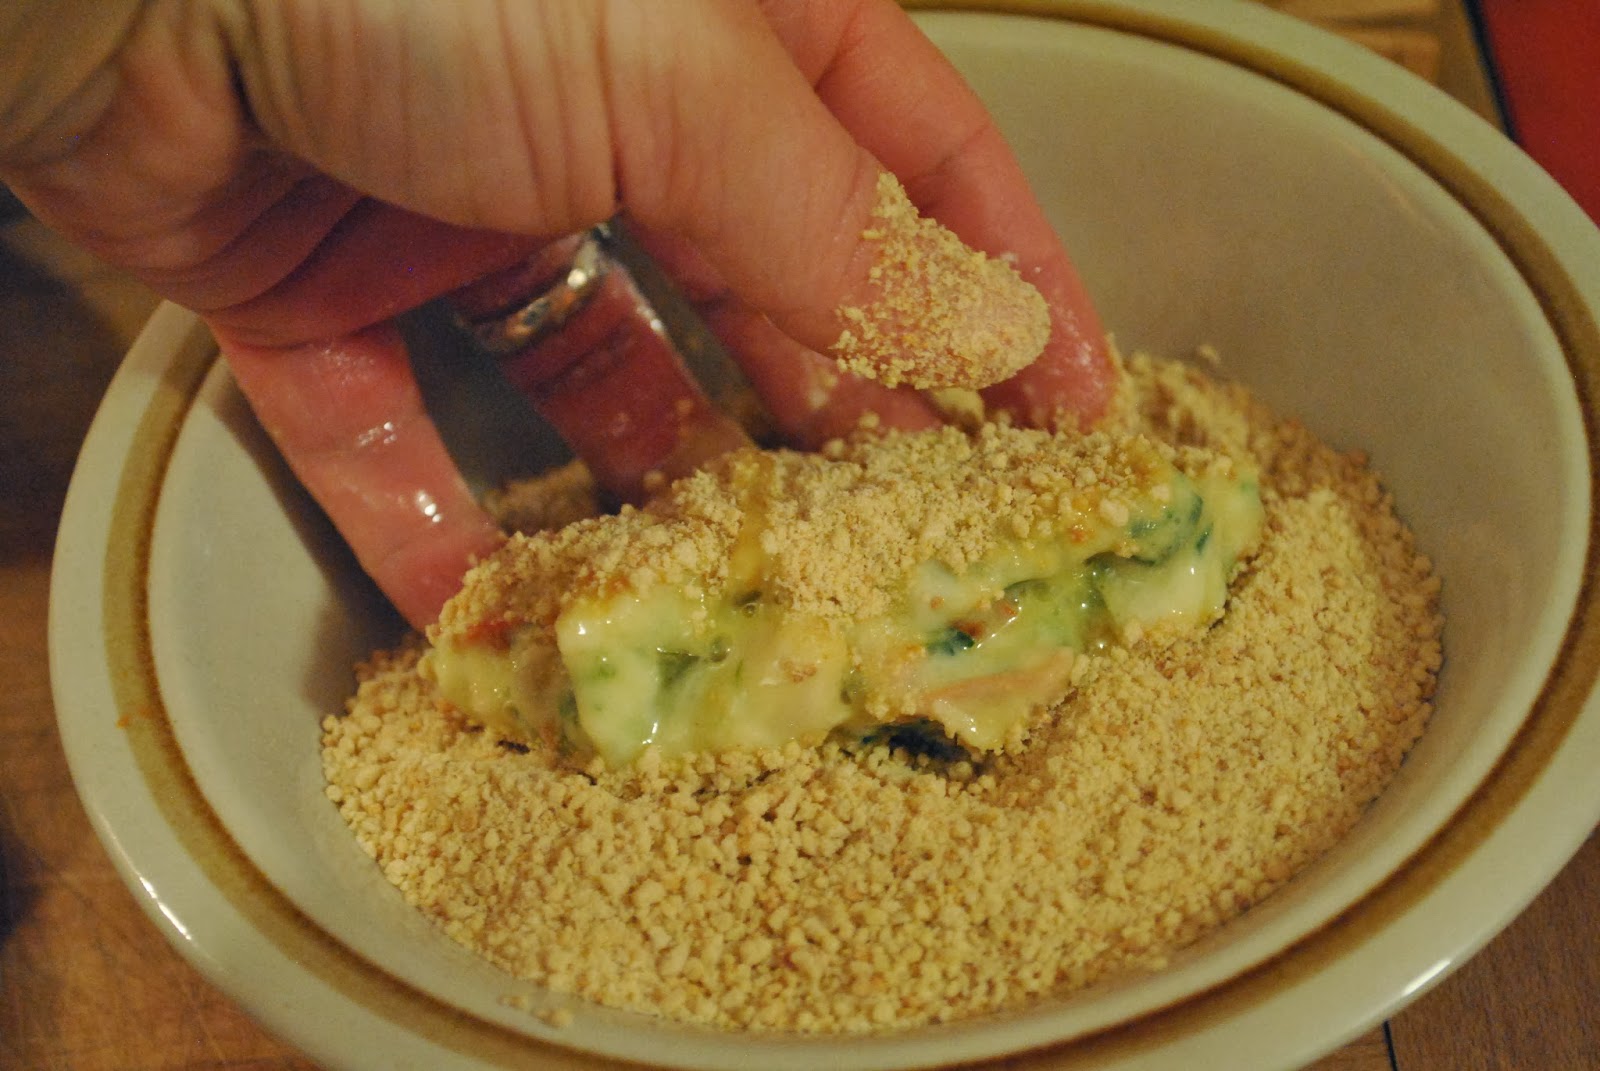
Transfer the roll to the final bowl and coat in bread crumbs. Once the mass is coated, you can form it into a nicer shape. It will be very delicate, so you need to be gentle.
Move the roll to a baking sheet, and repeat the process until all of your filling is gone. As you finish one croqueta and move on to the next, you might want to rinse your hands. Removing the clinging remnants of the previous croqueta helps to form the next. Slightly wet hands also help to prevent the bechamel mix from sticking to your fingers.
This process seems straightforward in writing, but when you start doing it you will realize what a pain it really is. I have done this many times, and I still get frustrated. Again, if you are going to do this for the first time, you might just want to use a thicker bechamel. It will make your life much easier.
Once your baking sheet is full, put it in the freezer for a day or so. This will ensure they are completely frozen and easier to handle. Once frozen, you can take them off the baking sheet and put into a Tupperware. Store them in the freezer and just pull out how many you need when you are ready to eat.
When you are ready to cook the croquetas, take out only how many you need. When we fry them, they need to still be frozen, otherwise they will fall apart. We deep fry them in olive oil. You do not need a lot of olive oil to do it, you just need a tall skinny pot to do it in. Using olive oil will make them so much better.
If you can not fry them completely submerged, it is possible to roll them around in a pan with a shallow layer of oil. You will still need a fair amount of oil: maybe 1" (2.5cm) deep. We used to cook them in a pan, but it is very hard to keep them round. They often end up triangular. If you need to do it this way, use two spatulas and carefully roll them. Make sure that the side you are cooking is crisp and brown before rolling onto the next side.
Submerge the croqueta until it is golden brown and crisp. Let the oil drain off and place in a pie pan in a warm oven. Putting them in the oven keeps them hot while you cook the rest of them. Do not put in an oven that is too hot, because the croqueta will "pop" open and the fillings will drain out.
Once all of the croquetas are cooked, place them on a plate and enjoy with a nice green salad!